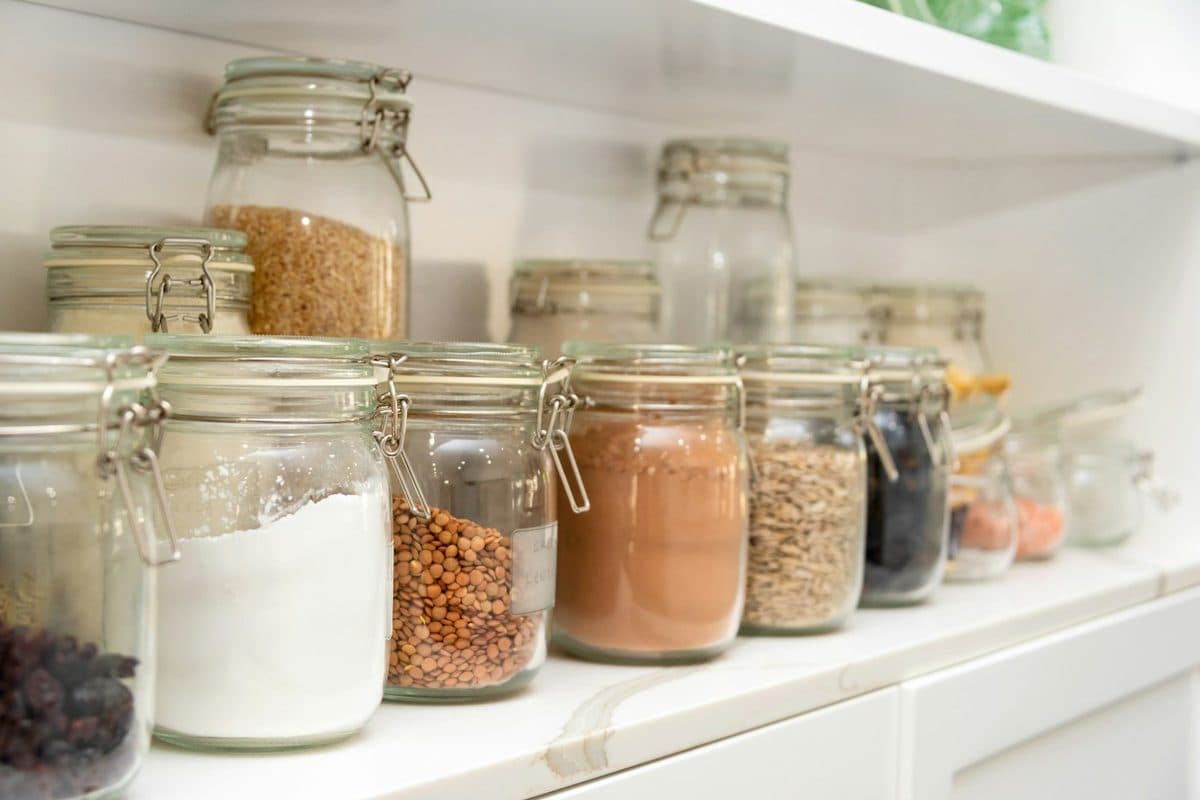
This short video is AI-generated to illustrate the steps.Glass jars of dry goods lined up on a white pantry shelf. Photo via Unsplash.
A small pantry has a way of turning into a guessing game. You know there's pasta in there somewhere, but you buy more anyway, because finding it would mean unpacking half the shelf. Then the bags of chips slide off the top, the spices multiply, and the back of the cupboard becomes a place where food quietly expires.
Good small pantry organization fixes that without needing a walk-in room or a big budget. Whether your pantry is a single kitchen cabinet, a narrow closet, or a shelf you've claimed for food, the same step-by-step process works. Below we'll walk through it, then cover setup tips specific to cabinet pantries, closet pantries, and kitchens with no pantry at all.
Costs are approximate ranges in USD based on typical big-box, discount, and secondhand prices. They vary by country and over time, so treat them as ballpark guides.
Key to labels:
🏠 Renter-friendly / no-drill — no holes, no permanent changes, easy to remove when you move out.
Approx. — rough cost range in USD.
Key takeaways
Empty the whole pantry, wipe the shelves, and measure height, depth, and width.
Sort into keep, use soon, donate if unopened and accepted locally, and toss.
Group food into categories such as breakfast, grains, cans, baking, snacks, and spices.
Put everyday items at eye level, light backups up high, and heavy items low.
Decant open dry goods into airtight containers; leave sturdy boxes and cans in their packaging.
On a cabinet door, use a rack or removable hooks only if the door still closes.
In a closet pantry, add an over-door rack, bins on deep shelves, and heavy items on the floor.
With no pantry, use a rolling cart, a lidded bin where the fridge allows it, or one dedicated cabinet.
1Step 1: Empty It Completely
Step 1. Empty the pantry and measure the shelves.
It's tempting to organize one shelf at a time, but a small pantry is usually quick enough to empty in one go, and seeing everything at once is what makes the rest of the process work.
Take everything out and put it on the counter or kitchen table.
Wipe down the shelves and check for crumbs, spills, or signs of pests.
While the shelves are empty, measure them: height between shelves, depth, and width. Note any awkward spots, like a pipe or a narrow gap beside the door frame.
Approx. cost: Free.
2Step 2: Check Dates and Edit
Step 2. Check dates, then keep, use soon, donate, or toss.
As you go through each item, sort it into one of four piles:
Keep: in date, in good condition, and something you actually eat.
Use soon: close to its date or already opened. These go into a "use first" spot (more on that below).
Donate: unopened, in date, but not something you'll use. Many food banks accept unopened non-perishables; check your local food bank's guidelines first, since rules vary.
Toss: past its date, stale, damaged packaging, or anything that looks or smells off.
A note on dates: "best before" or "best by" labels are generally about quality, while "use by" dates are more about safety, especially in the UK and Australia. When in doubt, follow your local food safety guidance and the label.
3Step 3: Group Food Into Categories
Step 3. Group food into categories before you assign shelves.
Now sort what you're keeping into groups. The exact groups depend on how you cook, but a typical small pantry might use:
Look at the size of each group. A big pile tells you it needs more space or a larger bin; a tiny pile might be combined with another group.
4Step 4: Assign Zones by How Often You Use Them
Step 4. Give each category a zone based on how often you reach for it.
This is the step that makes a small pantry feel bigger. Instead of putting things back wherever they fit, give each category a fixed zone based on how often you reach for it:
Eye level (prime real estate): everyday items like breakfast foods, snacks, and the use-first bin.
Top shelf: lighter, less-used items, such as backup paper goods, holiday baking supplies, or bulk refills.
Lower shelves and floor: heavy items like cans, jars, bottles of oil, and big bags of rice or potatoes. Keeping heavy things low is safer and easier on your back.
Door: small, flat items like spice packets, sauce sachets, foil, and wraps.
If kids or roommates share the pantry, put the snacks they're allowed to grab at their height, and keep other items higher.
5Step 5: Add Simple, Budget-Friendly Organizers
Step 5. Add risers, bins, and a turntable only where a category needs them.
Only now, after emptying, grouping, and measuring, is it time to think about containers. The pantry container calculator uses the shelf width, depth, and height to show how many fit. Here are the tools that tend to give the biggest improvement in a small space.
Shelf risers
Wire or bamboo risers create a second level on a shelf, perfect for cans and jars, so you can see the row behind. Expandable versions adjust to your shelf width. Approx. $8–$20 each.
Turntables (lazy Susans)
Ideal for deep corners, oils and vinegars, and sauces. One spin brings the back row to the front. Approx. $8–$20.
Bins and baskets with handles
Bins turn a deep shelf into a set of "drawers." Group each category in its own bin, then pull the whole bin forward to find something. Shoeboxes, sturdy delivery boxes, or dollar-store bins work just as well as more expensive ones. Approx. $0–$8 per bin.
Under-shelf baskets
These slide onto an existing shelf and hang below it, using the empty space above shorter items. Great for wraps, bags, or snack packs. 🏠 No-drill. Approx. $8–$15 each.
Can organizers
Tiered or rolling can dispensers keep cans visible and stacked neatly. If you don't buy a lot of canned goods, a simple riser is probably enough. Approx. $10–$25.
Clear, airtight containers (for some things)
You don't need to decant everything. Airtight containers are most useful for open bags of dry goods like flour, sugar, rice, oats, and cereal, which can go stale or attract pests. Square or rectangular containers use shelf space more efficiently than round ones. Sturdy boxes and cans can stay in their packaging. Approx. $15–$40 for a starter set; reused glass jars are free.
Labels
Label shelves or bins with the category name, not just the item, so the system survives when the products change. Masking tape and a marker work fine; a label maker is a nice extra. Approx. $0–$30.
How Do You Set Up a Cabinet Pantry?
Cabinet pantry. Use the door and the full shelf height.
If your "pantry" is a single cabinet, every inch counts.
Use the full height. Many cabinets have one shelf with a large gap above it. A riser or a stackable shelf can double that space. Approx. $8–$20.
Use the inside of the door. An over-the-cabinet-door rack or removable adhesive hooks can hold spice packets, measuring cups, or wraps. Measure the gap first so the door still closes. 🏠 No-drill. Approx. $8–$20.
Try pull-out baskets. Freestanding sliding baskets sit on the shelf (no screws) and pull out like drawers. 🏠 No-drill. Approx. $15–$35.
Store spices separately. A tiered spice step or a shallow drawer insert stops small jars from getting lost behind larger items. Approx. $10–$20. Which of those homes fits a tiny kitchen is in spice organization for a tiny kitchen.
How Do You Set Up a Closet Pantry?
Closet pantry. Use the door, deep-shelf bins, and the floor.
A narrow closet pantry has more room, but often has deep shelves and wasted space on the floor and door. The counter outside that closet is covered in small kitchen counter organization.
Add an over-the-door rack. One of the most useful additions to a closet pantry, holding spices, snacks, or cans. 🏠 No-drill (choose a hook-over style). Approx. $25–$60.
Use bins on deep shelves. Put a bin for each category from front to back so nothing gets stranded behind other items.
Use the floor. Store heavy or bulky items here: bottled water, bags of potatoes or onions in a ventilated basket, and the recycling bin if space allows.
Add shelf liners to wire shelves. Small items stop tipping through the gaps. 🏠 No-drill. Approx. $8–$15.
Hang a tension rod. Inside the closet or under a shelf, a tension rod can hold spray bottles or bags on S-hooks. 🏠 No-drill. Approx. $5–$15.
What Can You Use If You Have No Pantry?
No pantry. Use a cart, a dedicated cabinet, or a freestanding shelf.
Plenty of small apartment kitchens have no pantry at all. A few options:
Freestanding pantry cabinet or bookcase: a tall, narrow unit near the kitchen. Use closed bins to keep it looking tidy, and anchor tall furniture against tipping (ask your landlord about the small screw an anti-tip kit needs). Approx. $50–$150.
Slim rolling cart: fits in the gap beside the fridge or between the counter and wall. 🏠 No-drill. Approx. $20–$60.
Top of the fridge: a lidded bin for light items like snacks or paper goods. Check your fridge manual first, since some models need clear space on top for ventilation.
One dedicated cabinet: pick the cabinet closest to your prep area and turn it into a mini pantry using the cabinet tips above.
If you live in a studio, our guide to studio apartment organization covers how to fit kitchen storage into a one-room layout.
How Do You Keep a Small Kitchen Pantry Organized?
A system only works if it's easy to maintain. These habits keep a small pantry from sliding back into chaos:
Front to back: put new groceries behind older ones, so the oldest gets used first.
Keep a running list: a notepad on the pantry door or a shared list on your phone. Add items when you open the last one.
Respect the zones: if a category outgrows its bin, adjust the zone rather than squeezing items elsewhere.
Monthly 10-minute check: wipe shelves, move anything near its date into the use-first bin, and note what you keep overbuying.
All-steps checklist for organizing a small cabinet or closet pantry.
What Does a Working Pantry Look Like?
A small pantry doesn't need to look like a showroom to work well. If you can open the door, see what you have, and grab what you need without unpacking a shelf, it's doing its job. Start with the empty-and-group steps this week, add organizers only where you need them, and let the zones do the rest.
Pinterest pin: Step-by-step small pantry organization guide
Pinterest pin: Small cabinet pantry ideas with risers and door racks
Frequently asked questions
How do I organize a small pantry with deep shelves?
Use bins with handles or pull-out baskets so you can slide the whole group forward instead of reaching into the back. Put the items you use less often in the back bins and everyday items in front. A turntable also works well in deep corners.
Should I decant everything into matching containers?
No. Decanting is helpful for open bags of dry goods like flour, sugar, rice, and cereal, because airtight containers keep them fresher and easier to stack. Boxes and cans that are already sturdy can stay in their original packaging, grouped in bins.
What can I use if my kitchen has no pantry?
Try a freestanding pantry cabinet or bookcase, a slim rolling cart beside the fridge, a lidded bin on top of the fridge for light items, and one dedicated kitchen cabinet set up as a mini pantry. Over-the-door racks on a nearby closet also work.
How do I organize a pantry on a budget?
Declutter and group food first, then reuse what you have: shoeboxes, sturdy delivery boxes, and clean glass jars make good organizers. If you buy anything, start with a shelf riser, a few bins, and a turntable, which give the biggest improvement for a small cost.
How do I keep my pantry organized long term?
Give every category a fixed zone, put new groceries behind older ones, keep a running shopping list, and do a quick 10-minute check about once a month to wipe shelves and move anything close to its date to the front.
Get the small apartment checklist
One short email a week with a small-space fix that actually works in a rental. You also get our printable room-by-room checklist. No spam, unsubscribe anytime.
Build a pantry organization system for tiny kitchens: set zones, choose bins and containers, label clearly, and keep it tidy with a simple restock routine.
Organize a small kitchen counter: clear it, keep only daily tools out, set prep and sink zones, store the rest vertically, and reset the surface at night.
Organize under the kitchen and bathroom sink: measure around pipes, use bins and a caddy, separate daily supplies from backups, and keep a simple restock rule.